
How to disassemble a laptop is the process of safely opening your device to access internal components for repair, upgrade, or cleaning. Done correctly, it gives you full access to parts like RAM, storage drives, fans, and batteries without causing damage. The key word is “correctly.” Rushing in without the right tools or preparation is how people crack chassis panels, rip ribbon cables, and turn a $50 repair into a $500 replacement. This guide walks you through every stage of the laptop teardown process, from workspace setup to component removal, with the same care a trained technician would apply.
What tools do you need for laptop disassembly?
The right tools make the difference between a clean teardown and a stripped screw. For most laptops, you need a set of Phillips head screwdrivers in sizes PH0 and PH00, plus Torx drivers in T5 and T8 sizes for brands like Dell, Lenovo, and Microsoft Surface. A plastic pry tool or spudger is non-negotiable. Metal tools scratch chassis surfaces and can short circuit components if they slip near a connector.
An anti-static wrist strap and ESD-safe mat are equally critical. Dell’s field service guidelines specify that insulators like plastics should be kept at least 12 inches away from sensitive components during work. That rule exists because electrostatic discharge (ESD) can destroy a RAM module or wireless card without leaving any visible mark. You will not know the damage happened until the laptop fails to boot.

Beyond the core tools, a few extras save real time. Tweezers help you grip small connectors and pull tabs without slipping. A magnetic screw tray or a sheet of paper with labeled sections keeps screws organized by location. Isofix or isopropyl alcohol wipes clean thermal paste from heatsinks when you need to reseat them.
Pro Tip: Label each screw group with a sticky note as you remove them. Write the location directly on the note, such as “bottom left corner” or “near fan.” This takes 10 seconds per group and prevents reassembly confusion entirely.
Tool needs vary by model. A Framework Laptop 16 uses mostly Torx screws and is designed for user repair. A newer MacBook Air uses Pentalobe screws on the bottom and requires a P5 Pentalobe driver before you can even begin. Checking your model’s specific requirements before buying tools is not optional. It is the first step.
| Tool | Purpose | Notes |
|---|---|---|
| Phillips PH0 / PH00 screwdriver | Removing most laptop screws | Most common screw type |
| Torx T5 / T8 screwdriver | Dell, Surface, and some Lenovo models | Check your model first |
| Plastic pry tool / spudger | Opening bottom cover without scratching | Never use metal tools here |
| Anti-static wrist strap | ESD protection during component handling | Ground to unpainted metal |
| ESD-safe mat | Protects components placed on work surface | Keep plastics 12 inches away |
| Magnetic screw tray | Organizing screws by location | Prevents reassembly errors |
| Tweezers | Handling small connectors and pull tabs | Flat-tip preferred |
How to prepare before opening a laptop
Preparation is where most first-time repairs go wrong. Skipping steps here creates problems that show up later, often in ways that are hard to trace back to the real cause.
Follow this sequence before touching a single screw:
- Shut down completely. Sleep mode is not enough. A full shutdown cuts power to all components. Confirm the power light is off and the fan has stopped.
- Unplug the power adapter and all peripherals. Remove USB drives, external monitors, headphones, and any docking station connections.
- Remove the battery if it is external. Slide the latch, pull the battery out, and set it aside. Many older ThinkPads and budget laptops still use removable batteries.
- Verify your exact laptop model. Check the sticker on the bottom panel or look in your system settings under “About.” The model number and revision number both matter. iFixit stresses that small differences between MacBook revisions change which screws, parts, and procedures apply. The same logic applies to Dell XPS and HP Spectre lines.
- Find a model-specific repair guide. iFixit, the manufacturer’s service manual, or Microsoft Learn all publish teardown guides for popular models. Read the full guide before starting.
- Gather every tool and part you need. Planning tools and parts beforehand prevents mid-repair failure caused by missing items. Stopping halfway through a disassembly to find a screwdriver is how cables get left in awkward positions and connectors get stressed.
- Set up your ESD protection. Put on your anti-static wrist strap and clip it to an unpainted metal surface. Place your ESD mat on the work surface. ESD prevention is a continuous workflow, not a single action. It covers your workspace, your tools, and what you wear.
- Wear appropriate clothing. Avoid wool sweaters or synthetic fabrics that generate static. Cotton works well.
One detail that catches people off guard: sealed versus removable batteries. The Microsoft Surface Laptop 7 service guide requires full power-off and discharge before any internal access, precisely because the battery is sealed inside. You cannot remove it first. Knowing your battery type before you start shapes the entire safety workflow.
Step-by-step laptop teardown: from bottom cover to key components
This is the core of the laptop disassembly guide. Work slowly. Each step builds on the last, and reversing a mistake mid-process costs more time than doing it right the first time.
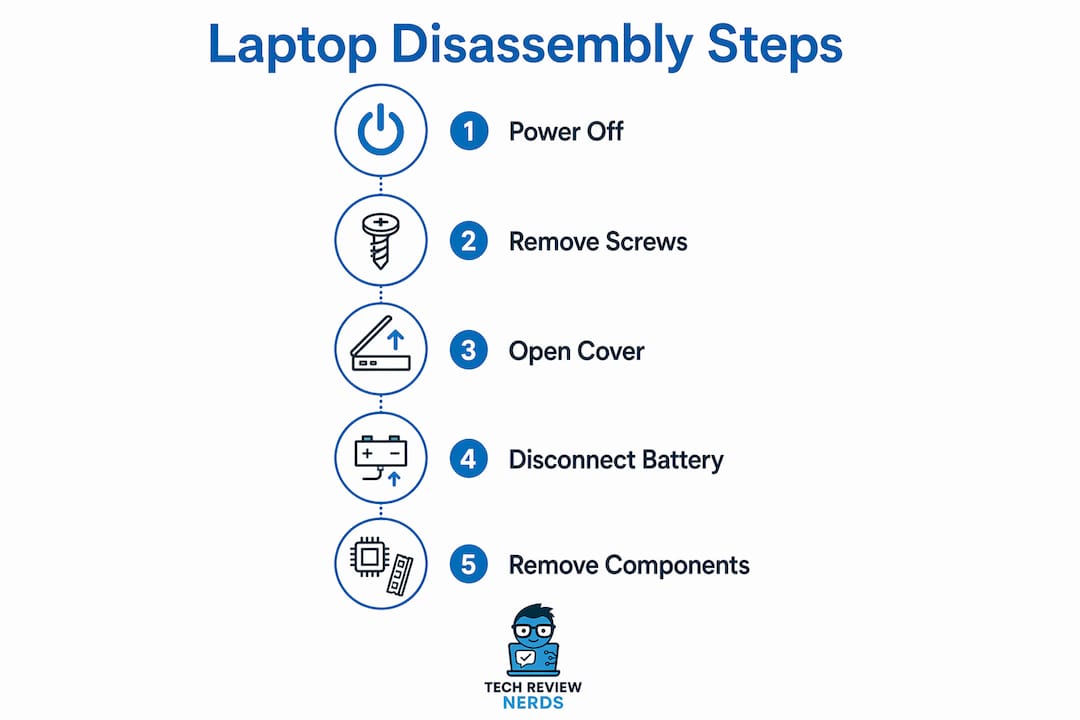
Removing the bottom cover
Start by flipping the laptop upside down on your ESD mat. Look for all visible screws on the bottom panel. Count them before you start. Many screws hide under rubber feet or stickers. Peel back rubber feet carefully with a plastic spudger. They are usually reusable if you work slowly. Remove every screw and place them in a labeled tray section marked “bottom panel.”
Once all screws are out, the cover may still feel stuck. That is normal. Clips hold the panel in place along the edges. Slide a plastic pry tool into the seam between the bottom cover and the chassis, starting at a corner. Work around the perimeter with gentle, even pressure. You will hear small clicks as each clip releases. Do not force it. If resistance is high in one spot, check for a missed screw.
Pro Tip: On many Dell Inspiron and HP Pavilion models, one screw hides under a small sticker near the hinge. Manufacturers place it there to discourage casual opening. Always run your finger along the entire bottom surface before assuming you have found every screw.
Disconnecting the battery (sealed models)
Once the cover is off, locate the battery connector on the motherboard. It is usually a flat, rectangular plug near the center or side of the battery pack. Use a plastic spudger to gently lever the connector straight up from its socket. Do not pull on the cable itself. Disconnecting the battery at this point cuts all residual power to the board, which is the safest state for the rest of the work.
Removing RAM
RAM modules sit in angled slots and are held by two metal clips, one on each side. Press both clips outward simultaneously. The RAM stick will pop up at an angle. Slide it out along that angle. Do not pull it straight up while it is still locked. Handle the module by its edges only. Fingerprints on the gold contacts can cause connection issues.
Removing storage drives
Most modern laptops use M.2 NVMe SSDs. These are small rectangular cards secured by a single screw at the far end. Remove that screw, lift the drive at a slight angle, and slide it out of the M.2 slot. Older laptops may use a 2.5-inch SATA drive held in a bracket with two to four screws. Remove the bracket screws first, then disconnect the SATA data and power cable from the drive.
Removing the fan and heatsink
The fan and heatsink assembly sits over the CPU and sometimes the GPU. It is held by several small screws, often numbered in the order they should be loosened. Follow that order. Loosening them in a random sequence can warp the heatsink and create uneven pressure on the chip. Disconnect the fan cable from the motherboard before lifting the assembly. Old thermal paste will be visible on the chip surface. Clean it with isopropyl alcohol before applying fresh paste if you plan to reseat the heatsink.
Handling ribbon cables and delicate connectors
This is where most disassembly failures happen. Ribbon cables and ZIF connectors are the most commonly damaged parts in DIY repairs. ZIF stands for Zero Insertion Force. These connectors have a small locking tab that flips up to release the cable. Flip the tab up first, then slide the cable out. Never pull the cable without releasing the lock.
Other connectors use a pull tab, which is a small piece of tape or plastic attached to the cable. Grip the pull tab, not the cable, and pull straight back along the cable’s direction. The Framework Laptop 16 disassembly guide specifically details these safe connector techniques because improper pulling is the leading cause of connector damage in user repairs.
Here is a quick reference for connector types you will encounter:
- ZIF connectors: Flip the locking tab up, then slide the ribbon cable out flat.
- Pull-tab connectors: Grip the tab, not the wire, and pull parallel to the board.
- Snap connectors: Press down on the connector body and rock it gently side to side to release.
- Antenna cables: Lift straight up from the wireless card using a plastic spudger under the connector head.
Place every removed component on your ESD mat. Never stack components on top of each other.
Common disassembly problems and how to fix them
Even careful work runs into complications. Knowing what to expect keeps you from making a bad situation worse.
- Stripped screws. This happens when you use the wrong size screwdriver or apply too much downward force. A rubber band placed between the screwdriver tip and the screw head adds grip. If that fails, a screw extractor bit set works on most laptop screws.
- Stuck bottom covers. If the panel will not release after all screws are removed, you have missed a screw or a clip is unusually stiff. Recheck every rubber foot location. Do not pry with metal tools.
- Damaged ribbon cables. A torn or kinked ribbon cable is one of the most expensive DIY mistakes. If a cable tears, the component it connects (often the keyboard, trackpad, or display) stops working. Replacement cables are available on eBay and AliExpress for most models, but the repair adds time and cost.
- Adhesive components. Newer MacBook batteries use adhesive strips rather than screws. iFixit recommends using adhesive remover solution applied carefully around the battery edges to soften the glue before lifting. Forcing an adhesive battery out can puncture the cell, which is a fire hazard.
- Screw mix-ups. Organizing screws by location is a technical skill, not a minor detail. Screws of different lengths look nearly identical. A screw that is 1mm too long can pierce a component on the other side of the panel during reassembly.
“If you reach a point where you are unsure what to do next, stop. Consult your model-specific guide, check iFixit’s teardown photos, or contact the manufacturer’s support line. Proceeding blindly through uncertainty is how minor repairs become major ones.”
One habit that pays off during reassembly: photograph every cable connection and screw location before you remove anything. A quick phone photo takes two seconds and gives you a reference image that removes all guesswork when you are putting things back together.
Key takeaways
Successful laptop disassembly depends on preparation, the right tools, and careful connector handling at every stage of the process.
| Point | Details |
|---|---|
| ESD protection is a full workflow | Use an anti-static strap, ESD mat, and keep plastics 12 inches from components. |
| Model verification prevents mistakes | Confirm your exact model and revision before buying tools or starting any repair. |
| Screw organization prevents reassembly failure | Label screws by location as you remove them to avoid size mix-ups later. |
| Connector handling is the highest-risk step | Always use pull tabs or release ZIF locks before moving any ribbon cable. |
| Preparation beats technical skill | Reviewing the full repair guide and gathering all tools before starting reduces errors significantly. |
What I’ve learned from taking apart dozens of laptops
I’ve opened a lot of laptops over the years, from budget Acer Chromebooks to high-end Dell XPS 15s and several generations of MacBook Pro. The single most consistent observation I can share is this: the people who damage their devices almost never lack technical ability. They lack patience.
The most common error I see is skipping the model verification step. Two laptops can share the same brand name and look nearly identical on the outside, yet use completely different screw types, connector positions, and internal layouts. I’ve watched someone use a guide for a ThinkPad T14 Gen 1 on a Gen 2 unit and crack the bottom cover because the clip positions shifted between revisions. That is a $30 panel that became a $90 replacement because of a skipped step.
My honest advice for anyone new to this: practice on a laptop you do not care about. Thrift stores and eBay regularly sell broken laptops for under $30. Opening one of those teaches you more in an hour than reading ten guides. You learn how clips actually feel when they release, how much pressure a pry tool needs, and how small ZIF connectors really are in person.
I also think the repair community underestimates how good manufacturer service manuals have gotten. Microsoft’s Surface documentation on Microsoft Learn is genuinely detailed. Dell publishes full field service manuals for most of its consumer lines. These are free, accurate, and written by engineers who designed the device. Use them.
One more thing: do not rush reassembly. Most people slow down for disassembly and then speed up when putting things back together, which is exactly backwards. Reassembly is where wrong-length screws get forced in and cables get pinched under panels. Treat it with the same care as the teardown.
— K. Connors
Techreviewnerds has more resources for laptop repairs
If this guide got you thinking about what else you can do with your laptop, Techreviewnerds covers the full picture.

The Techreviewnerds laptops section covers in-depth reviews, hardware comparisons, and practical repair context for the most popular models on the market right now. If you have just identified a battery issue during your teardown, the best laptop batteries guide points you to four reliable sources for quality replacements. For readers who want to verify whether an upgrade actually improved performance after reassembly, the laptop benchmark tests guide explains exactly how to measure the difference. All of it is written from real hands-on experience, with no paid placements shaping the recommendations.
FAQ
What is the first step to disassemble a laptop safely?
Power down the laptop completely, unplug all cables and peripherals, and remove the external battery if your model has one. For sealed-battery models like the Microsoft Surface Laptop 7, full shutdown and discharge are required before any internal access.
Do I need an anti-static wrist strap to open a laptop?
Yes. ESD can silently destroy RAM, wireless cards, and other components without any visible sign of damage. Dell’s field service guidelines recommend an anti-static strap grounded to unpainted metal and an ESD mat throughout the entire repair process.
How do I find hidden screws on a laptop bottom panel?
Check under all rubber feet and any stickers on the bottom surface. Many hidden screws sit beneath rubber feet near the corners or hinge area. Peel them back carefully with a plastic spudger, as most are reusable.
What is the most common mistake when taking apart a laptop?
Pulling ribbon cables without releasing the ZIF connector lock first. This tears the cable or damages the connector socket, often requiring a component replacement. Always flip the locking tab up before sliding any ribbon cable out.
Can I disassemble a laptop without voiding the warranty?
Opening a laptop typically voids the manufacturer warranty on most consumer models. Exceptions exist for brands like Framework, which explicitly supports user repair. Check your warranty terms before proceeding, and consider whether the repair cost justifies the risk.